
Welcome to my blog! I am an 18 year teaching veteran. I taught kindergarten for 17 years and am moving to THIRD GRADE to live out the rest of my teaching career. I am very excited for this move. I am super excited to be working with older kids and having the ability to do more in depth technology with them. I am a Google Level 1 Educator, Osmo Ambassador and Seesaw Certified Educator. This is a place to share ideas, tutorials, favorite finds, and all things third grade! Come with me
Monday, August 14, 2017
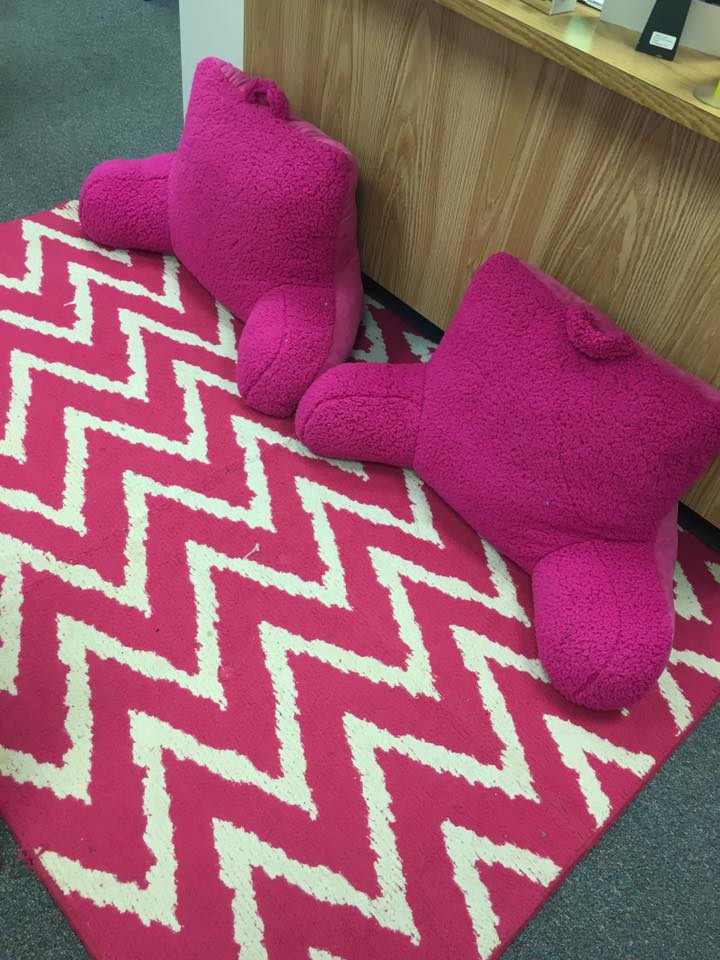
VIP Seat
I've been searching for a claw foot rub for my classroom for years. They are hard to find and really expensive. But last week I found this through a FB group I manage and got it for a steal! Painted it, going to add pillows and it will be my new VIP seat! Can't wait to add my VIP clipboards and pencil basket to it!!
Saturday, August 5, 2017
Flexible Seating or Cute Classroom Design?
Flexible seating is such a hot topic right now. Everyone is looking for things to use in their classrooms to allow for this. As moderator of a few groups on Facebook I am able to see the questions and comments people have about flexible seating, so it really made me think? Is flexible seating being used for its intended purpose or is it just a fancy way of decorating your classroom? Here's my opinion, take it or leave it. I believe that flexible seating, in the truest sense of the word, means that students are allowed the flexibility to find an alternative to a traditional chair that will help them work and learn better. That's it. But many others don't see it that way. So many people are using rotations and sign up sheets to manage theirs, but is that truly flexible seating or is it just alternate seating that looks like flexible seating. Here's the difference: flexible seating should be just that; flexible. A student who needs to work standing up should be given that choice and allowed to do that for as long as the need arises. He shouldn't work standing up on Monday, then to yoga balls on Tuesday, etc... If he truly needs to stand up to work then he should be allowed that choice every day. Alternate seating is just having a variety of seating choices in your room that are not necessarily used for individual student needs. Group A stands on Monday, yoga balls on Tuesday, on the floor on Wednesday, etc... There is no individual need taken into account. I think that in order to call it flexible seating then students should be the ones responsible for the choosing of seats, otherwise its just another group rotation to manage. Like I said, you may choose to disagree, but this is how I see it and how I do it in my room. So, what does it look like in room 8?
Last year, through a generous grant from Donor's Choose, I was able to get several items to begin flexible seating in my classroom. I got 2 flower shaped tables that were low to the floor, 2 stability ball chairs, 3 wobble stools, and some wobble cushions. I added pillows, low stools, high stools, husband reclining pillows, and a standing table to have a space that would meet the needs of all learners. This year I am adding scoop rockers!


Last year, through a generous grant from Donor's Choose, I was able to get several items to begin flexible seating in my classroom. I got 2 flower shaped tables that were low to the floor, 2 stability ball chairs, 3 wobble stools, and some wobble cushions. I added pillows, low stools, high stools, husband reclining pillows, and a standing table to have a space that would meet the needs of all learners. This year I am adding scoop rockers!


Since I got my things after the school year started I was fortunate enough to already have rules and procedures established, which made introducing the seating very easy! I started off by assigning seats. Then I would rotate the students through the tables each day until they had a feel for how each seat worked. Granted, I had 2 students who needed a certain seat so those were assigned by me. Once students figured out which one worked best for them, which was about 2 weeks, I let go of the reigns and gave free choice. It's amazing how they went to the same seat every day. Some worked better on the floor, some did better standing up, and some just preferred a regular old chair. It did not matter to me where they sat as long as they were able to work. For my students who I know need to move, I gave them first choice on the stools and balls so they could try them while working. We had conversations about how they felt, if they thought they worked better while using them, etc... Once we established their seat then it was theirs until it stopped working. I did have to change out a few seats due to behavior, but it really was a pretty easy thing to do. Interestingly enough, I found that only a few students really required a specific seat. To make it truly flexible they chose each day, and most went to the same seat. It was amazing to me how many students preferred a traditional chair. This year I will assign seats from the beginning of the year until rules and procedures are established before giving up the reigns. Then I will use my observations and try to help students find the seat we both think will fit them. Is there really a correct way? Probably not. It's all about what works for you and your class at that moment. Is it fool proof? Nope. Nothing is. There are tweaks that need to be made here and there along the way. Does it work? Absolutely. I can say without a shadow of a doubt that giving more flexibility and choice gave students ownership of themselves and the classroom and reduced our behavior issues drastically! You know, even my kinders are self reliant and love the sense of trust we give them in making their own choices. It makes them feel like they have a voice in the classroom and does wonders for building classroom community. I guess the only question left now is "How are you going to implement it this year?"
Monday, July 31, 2017
Using Seesaw Learning Journals For Student Assessment
I know there are many of us who are using Seesaw Learning Journals as a tool for students to showcase their work and communicate with families. But, did you know it can also be a very powerful resource for student assessment? Yes! It is. And the best part is that you can choose to share the information immediately with parents to strengthen those home-school connections or you can save the information in private folders that you can access for report card information. I personally love sharing the information with parents because then they become partners in their child's education and they know exactly how they are doing and what they should help them with at home. So, how do I do it? Easy. I create my assessments in PowerPoint or Publisher and then save them as JPEG files. I upload the files to my teacher folder and then "copy and edit" a new one for each student! Simple as can be. If I want to share the information with parents then I tag the student and submit it to their journal. If not, I save it to my private folder that parents cannot see (this is a feature of Plus). If you don't have Plus you can do this by simply leaving it in your folder and not tagging students. Another thing I like to do is add a skill to each assessment. Then I can go and see which students are in the same level and can use this information for grouping! It's so easy!! Here's a picture of an assessment at the beginning of the year.
 When I want to mark on top of the same assessment I just copy and edit again and choose a different color pen! I also date it with the color so I know when it was assessed. Another way I like to use Seesaw for assessments is to record my students reading and use the information to show parents how they are progressing. I have solid evidence of their reading and I can give specific information for the strategies they need to be working on.
If you'd like to venture into the world of Seesaw Assessments but don't know where to start I have a Seesaw Assessment Pack in my TPT store that will get you started! In this packet you will have JPEG files for upper and lower case recognition, letter sounds, name writing (with and without lines), 2 and 3 dimensional shapes, colors, number recognition and writing and sight words. See the preview below!

I hope you enjoy using this resource. You'll love the ease of using Seesaw for assessment!!

If you'd like to venture into the world of Seesaw Assessments but don't know where to start I have a Seesaw Assessment Pack in my TPT store that will get you started! In this packet you will have JPEG files for upper and lower case recognition, letter sounds, name writing (with and without lines), 2 and 3 dimensional shapes, colors, number recognition and writing and sight words. See the preview below!
I hope you enjoy using this resource. You'll love the ease of using Seesaw for assessment!!
Wednesday, July 5, 2017
Sight Words That Make Sense
Last year I really noticed that my students were struggling to grasp their sight words, so I did a LOT of research into best practices, programs, strategies, and new ways to teach them that would help them master them quickly and effectively. My team and I decided to go with differentiated sight words lists. I started searching for lists but just couldn't find what I wanted. Some came close, but none really fit what I felt gave my students the words they needed in the correct order to be able to write sentences from the start. So, my team and I decided to create our own list that makes sense. We started with the most basic words that kindergarten students need to write sentences and went from there. Each list has 10 words and is color coded. These words are from our district's list of required words.
 The first 10 words are the words that all kindergarten students need to be able to know in order to write simple sentences and that you will find in most of the predictable books. They also fit into all of your beginning of the year themes (All About Me, Brown Bear, My Body, Friends, Apples, Fall). They just make sense.
So why go to all the trouble to do color coded lists? Well, we all know that our students come to us on many different levels. I had students this year who already knew how to read, so it seemed silly to have them working on the words "I" and "my" when they clearly needed more difficult words. So, this makes perfect sense. The second week of school I assessed each student to see how many words they knew and used that information to determine the list they would start on. I then sent home the list on color coded paper for them to use for practice at home.
My students have found so much success by using words that they want to learn instead of eing forced to only work on the ones we are teaching. It helped improve their reading and writing! The set will be available in my TPT store very soon!

So why go to all the trouble to do color coded lists? Well, we all know that our students come to us on many different levels. I had students this year who already knew how to read, so it seemed silly to have them working on the words "I" and "my" when they clearly needed more difficult words. So, this makes perfect sense. The second week of school I assessed each student to see how many words they knew and used that information to determine the list they would start on. I then sent home the list on color coded paper for them to use for practice at home.
 |
| Student Assessment of Sight Words |
Subscribe to:
Posts (Atom)