Monday, May 25, 2020

End of the Year Treat (and FREEBIE!!)

Here we are heading into the last week of school. I've been trying to think of something fun and clever to send home with my kiddos. But it also had to be something that I could easily create that would fit inside their paper bags of their stuff. 

I stumbled across the idea for a S'mores bag and though it was perfect! It said, "I wish we had s'more time together". So simple but to the point. I hate how this year ended, but I loved the message of it. So, I created my own and wanted to share for anyone else who might want it! Download the FREE file for it at the bottom of this post. It is editable so you can add your own name!


The tags for the bags are the perfect size for those portion control bags from Target. I stuck one tag inside the bag, broke a whole graham cracker in half, added an individual Hershey bar and one of the flat s'mores marshmellows. They all fit perfectly! Grab the free tags below.


Friday, May 15, 2020

The Flock

Here’s a look at the flock we are raising. They were all hatched in my classroom and have become pets. We lose and gain new ones every year so this is our current flock. Lemondrop (my Ameraucauna) is the OG and my baby. She loves to eat out of my hands. She’s quite the diva. It’s her way or no way when it comes to just about everything from eating to laying to roosting. She’s the boss and you don’t cross her. She LOVES to eat and will choose to eat from my hand when I give treats rather than eat off the ground. She’s my baby and the inspiration for my logo.

Thursday, May 14, 2020

The Finished Digital Classroom!

This evening I created Bitmojis of my teaching assistant and added her to our classroom. It is now complete and ready to upload to our kiddos. I also used a Bitmoji to make these postcards to mail to our sweet kinders! Can't wait for them to get them!


Wednesday, May 13, 2020

Bitmoji App Smashing

I am obsessed with the Bitmoji integration options! This morning I was playing around with some apps that I use with my kinders and found a way to make my Bitmoji "talk" to my students! It was so much fun! First, I uploaded my Bitmoji Classroom picture into Pic Collage and added some stickers to decorate my room. Then I imported that into Chatterpix and recorded my message!  If you're not familiar with Chatterpix it is an app that lets you "animate" any picture by drawing a line on an image to make a mouth. You then record yourself speaking and the "mouth" moves as if it is talking. My kinders really like this app! See the final product below. Pic Collage and Chatterpix are both free on the App store! You can view a quick tutorial on how to do this HERE! I use Seesaw in my classroom so I can easily send these videos to their journals!


Tuesday, May 12, 2020

Bitmoji Craze

Have you jumped on the Bitmoji Craze? It's so much fun create different looks for your digital activities. I've seen some really cool ways to use them. My favorite so far is the Bitmoji Classroom! Today I jumped on the Bitmoji train and created my own version. I love how it turned out. Like every teacher in the country right now I am so sad that I can't be in my classroom. I'm sure it sounds silly but creating this digital classroom was so therapeutic and relaxing. It was what my sad heart and creative mind needed today.  And it was really so easy to do. You ready? Here is the secret...
I used Google slides to create this but you could use PowerPoint or Publisher. Google slides is best if you're using any Google platform, Seesaw or wanting to have live links embedded. If you just want a picture or header for something then Publisher and PowerPoint are fine.

**Step 1- create your background. I applied the pink color as the background to create the walls. Then I added a rectangle shape to make the floor. There are so many ways to create a room. You can import pictures you find online or purchase pre-made backgrounds on TPT.

**Step 2- Add your items. I confess, I am a clip art junkie so I used clip art that I purchased on TPT. All of the classroom furniture and decorations are from there. (links below) You can also find objects to use online. SUPER IMPORTANT thing to remember; make sure images you import are PNG files with transparent backgrounds. JPEG files will have the white box around them. You can search and add PNG in your search box to bring up those files. (That's why I like getting clip art. The files are always transparent PNG files and you don't have to worry about copyright issues either.)

**Step 3- Add your Bitmoji. The possibilities are endless! If you want a Bitmoji that is plain, just you, then search "pose" and you'll find your Bitmoji in various poses without any extras added in.

It really is that simple! Still not sure? Start small. As you get more comfortable with the process then you can get creative. So, what are you waiting for? Go. Create. Enjoy!

Links to resources:
Short video tutorial HERE:
Longer walk through without voiceover HERE (might want to mute to avoid hearing all of the mouse clicks)

Clip art resources. These are not my designs. Just ones I like from sellers I follow. Click on the image to go to the source.
Classroom Furniture Clip Art    Classroom Furniture Clip Art 

Simple Backgrounds BOTTOMLESS BUNDLEFlexible Seating Clip Art

Monday, August 14, 2017

VIP Seat

I've been searching for a claw foot rub for my classroom for years. They are hard to find and really expensive. But last week I found this through a FB group I manage and got it for a steal! Painted it, going to add pillows and it will be my new VIP seat! Can't wait to add my VIP clipboards and pencil basket to it!! 

Saturday, August 5, 2017

Flexible Seating or Cute Classroom Design?

Flexible seating is such a hot topic right now. Everyone is looking for things to use in their classrooms to allow for this. As moderator of a few groups on Facebook I am able to see the questions and comments people have about flexible seating, so it really made me think? Is flexible seating being used for its intended purpose or is it just a fancy way of decorating your classroom? Here's my opinion, take it or leave it. I believe that flexible seating, in the truest sense of the word, means that students are allowed the flexibility to find an alternative to a traditional chair that will help them work and learn better. That's it. But many others don't see it that way. So many people are using rotations and sign up sheets to manage theirs, but is that truly flexible seating or is it just alternate seating that looks like flexible seating. Here's the difference: flexible seating should be just that; flexible. A student who needs to work standing up should be given that choice and allowed to do that for as long as the need arises. He shouldn't work standing up on Monday, then to yoga balls on Tuesday, etc... If he truly needs to stand up to work then he should be allowed that choice every day. Alternate seating is just having a variety of seating choices in your room that are not necessarily used for individual student needs. Group A stands on Monday, yoga balls on Tuesday, on the floor on Wednesday, etc... There is no individual need taken into account. I think that in order to call it flexible seating then students should be the ones responsible for the choosing of seats, otherwise its just another group rotation to manage. Like I said, you may choose to disagree, but this is how I see it and how I do it in my room. So, what does it look like in room 8?

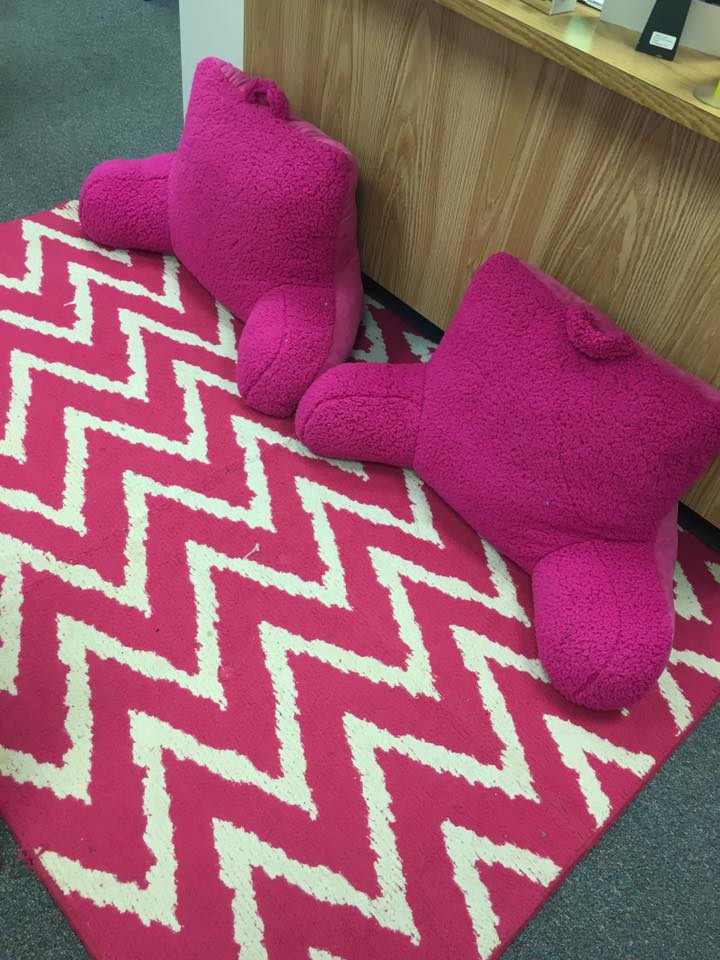
Last year, through a generous grant from Donor's Choose, I was able to get several items to begin flexible seating in my classroom. I got 2 flower shaped tables that were low to the floor, 2 stability ball chairs, 3 wobble stools, and some wobble cushions. I added pillows, low stools, high stools, husband reclining pillows, and a standing table to have a space that would meet the needs of all learners. This year I am adding scoop rockers!


Since I got my things after the school year started I was fortunate enough to already have rules and procedures established, which made introducing the seating very easy! I started off by assigning seats. Then I would rotate the students through the tables each day until they had a feel for how each seat worked. Granted, I had 2 students who needed a certain seat so those were assigned by me. Once students figured out which one worked best for them, which was about 2 weeks, I let go of the reigns and gave free choice. It's amazing how they went to the same seat every day. Some worked better on the floor, some did better standing up, and some just preferred a regular old chair. It did not matter to me where they sat as long as they were able to work. For my students who I know need to move, I gave them first choice on the stools and balls so they could try them while working. We had conversations about how they felt, if they thought they worked better while using them, etc... Once we established their seat then it was theirs until it stopped working. I did have to change out a few seats due to behavior, but it really was a pretty easy thing to do. Interestingly enough, I found that only a few students really required a specific seat. To make it truly flexible they chose each day, and most went to the same seat. It was amazing to me how many students preferred a traditional chair. This year I will assign seats from the beginning of the year until rules and procedures are established before giving up the reigns. Then I will use my observations and try to help students find the seat we both think will fit them. Is there really a correct way? Probably not. It's all about what works for you and your class at that moment. Is it fool proof? Nope. Nothing is. There are tweaks that need to be made here and there along the way. Does it work? Absolutely. I can say without a shadow of a doubt that giving more flexibility and choice gave students ownership of themselves and the classroom and reduced our behavior issues drastically! You know, even my kinders are self reliant and love the sense of trust we give them in making their own choices. It makes them feel like they have a voice in the classroom and does wonders for building classroom community. I guess the only question left now is "How are you going to implement it this year?"